
How to make your own ceiling pendant light
Building a pendant light is fairly straightforward once you break it down into the right decisions.
Whether you need a simple single pendant, something to suit a particular shade, or a larger multi-drop stairwell light, the process is basically the same:
- Choose the ceiling rose
- Plan the cable drops
- Choose the cable
- Choose the lampholders
- Decide who will assemble it
This guide takes you through each step and helps you choose compatible parts.
The main parts of a pendant light
A pendant normally has four main components:
- Ceiling rose
- Cable
- Lampholder
- Lamp or light bulb
The 4 Main Parts Of The Pendant Light You Need To Consider


Once you know what the four parts are, start at the ceiling and work down.
Step 1: Choose your ceiling rose
Start by choosing a ceiling rose that suits the look and size of the pendant you want to make.
For a straightforward single-drop pendant, you can normally choose the rose you prefer and then build the cable and lampholder around it.
For a multi-drop or stairwell pendant, think about two things before ordering:
- How many cable drops you want
- Where you want those drops positioned
For larger designs, our 450mm Giant Ceiling Rose gives you room to create spiral, perimeter or other multi-drop arrangements.
Planning outlets on a larger rose
Our standard outlet position is 30mm from the edge, evenly spaced around the perimeter.
If that works for your design, simply select the number of outlets you require when ordering the rose.
If you need particular positions, exact dimensions or a layout from your own drawing, choose the Custom Layout / Setup option when it is offered with the product.
If you are using shades, remember to leave enough space between adjacent drops so the shades will not touch.
Once you know how many drops you want, move on to the cable.
Step 2: Plan your drops and choose the cable
First decide how you want the finished pendant to hang.
You might want:
- Drops at the same height
- A gradual spiral
- Different heights
- A more irregular arrangement
For a spiral, decide your shortest and longest drop first.
You can work out an even increase between the drops using:
(Longest drop − shortest drop) ÷ (number of drops − 1)
Then work upwards from the shortest length using that increment.
Add the individual lengths together to work out approximately how much cable you need. Allow a sensible amount for connections and trimming.
You can browse our cable range once you know the style and amount required.
For pendant work, 0.75mm flex is commonly used. If you are using a metal lampholder, choose an appropriate 3-core cable so the metal parts can be correctly earthed.
If you are unsure which flex is suitable for your components, contact us before ordering. It is much easier to check compatibility first than change parts afterwards.
Step 3: Choose your lampholder
Now choose the pendant lampholder that will sit at the end of the cable.
If you are not using a shade, the main decisions are normally:
- Lamp cap — for example ES, SES, BC or SBC
- Finish
- Style
- Whether you want metal or plastic
If you are using a shade, check the shade opening before choosing the lampholder.
Measure the diameter of the hole where the lampholder passes through the shade.


As a general guide:
- Around 40mm usually suits an E27 lampholder.
- A shade reducing ring may allow some smaller lampholders to be used with a 40mm shade opening.
- Around 30mm commonly suits BC or SES lampholders.
- Less common openings may need a different lampholder or an adaptor.
Also check whether the lampholder needs separate shade rings. The individual product page should tell you what is supplied.
For more detail, see our guide to choosing a cordgrip lampholder.
Check the lamp cap as well
If you already have the bulb you want to use, make sure its cap matches the lampholder.


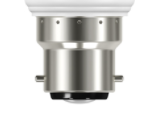

Once the shade, lampholder and lamp all match, you are ready to decide how the pendant will be assembled.
Step 4: Decide who will assemble it
You now have the main components:
- Ceiling rose
- Cable
- Lampholder
- Shade, if required
- Lamp
The next decision is whether the pendant will be assembled by you or your electrician, or whether you would like Lampfix to make it up.
If assembly and wiring are within the competence of the person doing the work, you can order the individual components and assemble them separately.
Alternatively, choose our Pendant Assembly Make Up Service when ordering and we can assemble the pendant for you.
For multi-drop roses, select the appropriate number of drops so that the assembly requirement matches the pendant you are ordering.
Larger giant roses need additional consideration when being mounted and connected. Check the product-specific installation information supplied with the rose and make sure the ceiling support, fixing method and electrical installation are appropriate for the finished fitting.
Step 5: Check everything before ordering
Before checking out, run through the pendant from top to bottom:
Ceiling rose
Is it the right size, finish and number of outlets?
Outlet layout
For multi-drop roses, have you selected the correct number and positioning of outlets?
Cable
Is it the correct type, number of cores and total length?
Lampholders
Do they suit the cable, shade and lamp?
Shade rings or other accessories
Have you included anything the lampholder or shade needs?
Assembly
Are you assembling it yourself, or have you selected the assembly service?
If everything matches, you can complete the order.
Delivery options and current charges will be shown at checkout. Larger finished or custom products may have their own delivery requirements, which will be shown on the relevant product page or during ordering.
Not sure which parts work together?
That is exactly the sort of thing we can help with.
If you have a shade, an existing fitting or an idea you're trying to create, send us a photo and the important dimensions, or give us a call on 01462 731 173.
We can help you identify the right parts and work out a practical way to put them together.